
Click here to download Constant Info Pro.
[If you wish to try the SQL Version click here. Constant Info Pro SQL. It will place sqlite3.dll into the same folder when you launch it. That DLL contains the SQL functionality required for this version. There are some different prompts in this version.]
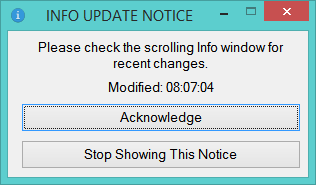
[Version 1.58 (01/06/18) – Changed Info Update window to remove Bold text, reduce the font size and added a “Stop Showing This Notice” button. This function is the same as choosing “Suppress Update Notices” from the program’s right click menu.]
Version 1.57 (12/23/17) – A lot more testing and tweaking since version 1.52. Version 1.51 (11/17/17) Fixed: An issue with some repeating items showing as blank. Tweaked file saving. Version 1.50 – Added un-hiding of the scroll window and items whenever a computer comes out of Sleep or Hibernation. Version 1.48 adds Advanced Notification of dated items and Weekly repeats. After extracting the Constant Info Pro program from the Zip file, just double click it to run.

After completing the first release of Constant WORD, I kept thinking there was some other uses for displaying text in a banner (ticker) format. At work, we use a program to track our tasks and it categorizes tickets by severity or importance and by location. We frequently get emails related to big issues going on or for upcoming changes.
I felt the banner format could be used as an early notification system for teams or work groups. Using severity codes 0 to 5 the program can display important items (issues) and let users know how quickly they need to be addressed or how widespread they are.
The program has grown since then to include more information. Users can now input the following:
- Item Description – enter a short description of the reminder, task or issue. This text is what displays in the scroll window.
- Item Date – (displays on a specific date unless Repeats are used) which can also be left blank in order to continue showing the item until it is deleted.
- Item Repeat – (blank, Monthly, Biweekly or Weekly). Monthly displays the item on the same day of each month until changed. Biweekly displays the item if today’s date is a multiple of two weeks from the stored date. Use Advance Notices from the menu to see items 1 to 7 days ahead of time.
- Item Link – Users can click on the three dots button (…) and then select a file or click on “HTTP” to have the program enter http:// into the link field. Copy/Paste any desired web link into the edit box. When items are being displayed, they will be surrounded with asterisks if a link is present (i.e. *This is a test*). Users can right-click the item and choose Open Link or hold down the CTRL key then double-click the item to open the linked file or web page.
- Item Priority – Choose a number from 0 to 5 to prioritize the item. This number determines what color the item is displayed with.
- The colors are as follows:
- 0 – Info – Gray
1 – Sev1 – Red
2 – Sev2 – Maroon
3 – Possible Issue – Olive
4 – Resolved – Green
5 – Notice – Teal
- 0 – Info – Gray
- Items may be prefaced with Labels or those may be turned off. [In a future release, Labels will be changeable by users.]
- The colors are as follows:
- Item Extra Text – A much longer section of text detailing each item can be entered into this field. Items containing extra text are surrounded with brackets (i.e. [this is a test]). Right clicking on the item and choosing “Show Extra Text” will display the text in a separate window.
- When items are added, the program also adds the current user name. This is only for display and isn’t changeable. It serves as an audit trail for team users of this program. However, it will be deleted when the item is deleted. Perhaps in the future a regular audit log will be kept separately.
When the program is first run, it will prompt for the folder you want to save the Info file into. The file is called ConstantInfoPro.txt.

The info file is created with sample data and starts scrolling at the top, middle part of the main monitor. You will also see these basic instructions:
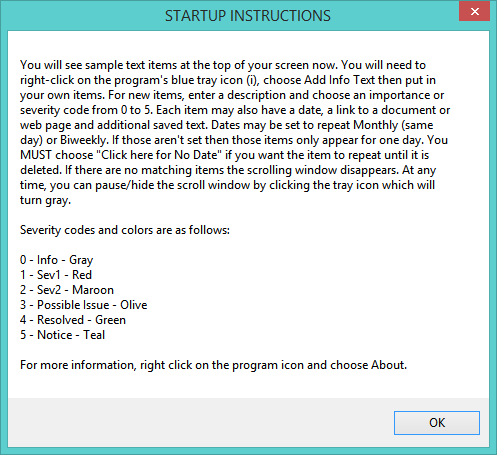
At the top, you will see the scroll window:
![]()
Placing the mouse over the window displays some help text:

If an item has a Link or Extra Text, the popup window will note it. Right clicking on the window will display a small menu that is appropriate for the item. In this case, you can choose “Open Link” to display a local text file, if desired. You can always right click and Add new items and Edit all items.

If you are using the program for Reminders, you can clear a reminder in two ways: 1) delete the reminder or 2) right-click the reminder and choose “Hide this Item” to signify you have read it. Hiding items doesn’t delete them, it only hides them until you restart the program. At any time, you can unhide all hidden items by choosing “UnHide Items.”
Right click the window and choose “Add new Item” or use the menu option to add new items.

Double clicking on the window or choosing “Edit Items” will display the following list:
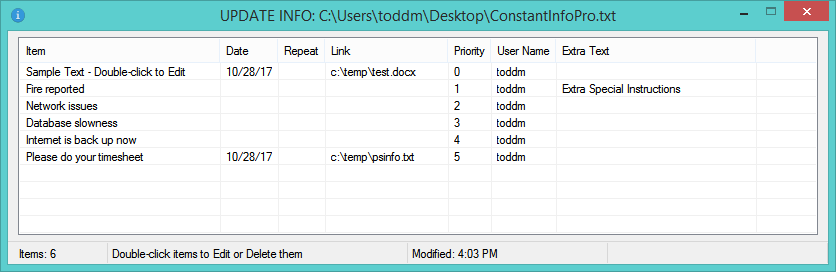
Double click an item to Edit or Delete it:
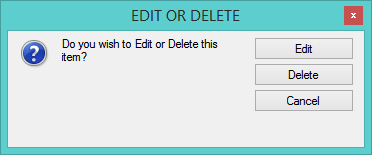
The Edit Info window has a number of options that make it easy to enter an item:
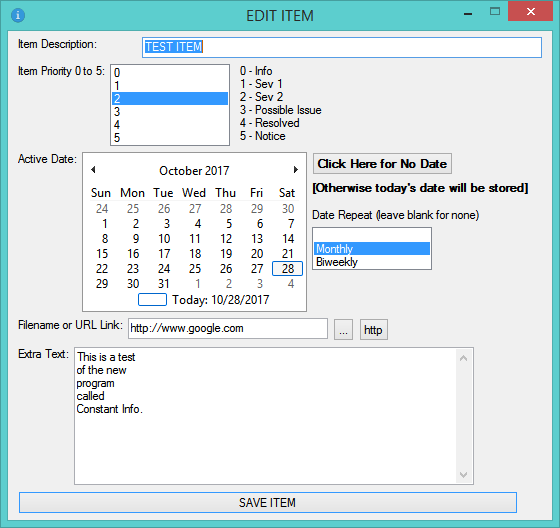
*IMPORTANT* – By using a calendar control to enter a date, remember that it will automatically insert today’s date UNLESS you click on the “Click Here for No Date” button. This will make sure the date is blank. If you want an item to only appear for a day then make sure the Date Repeat is blank. If you want to see an item the same day of every month then choose Monthly. If you want to see an item every other week on the same weekday then choose Biweekly.
For the scrolling window, you can change its Width, Location, Font Size, Font Style (Normal or Bold), add a Border, have the window Fade after 30 seconds so you can see underneath it (pointing to it will remove the fade) and change the scrolling speed. You can also hide or show the window by clicking on the program’s taskbar icon. The Ins, Delete, Home, End, Page Up and Page Down keys can be used to quickly move the window into 6 areas. Just click on the window first then press a key. If you have multiple monitors, mouse over the window, hold down the Shift key then drag the window to any screen you desire.
All of these items are in the right click menu. The all on One Line option is just an experiment. It shows items separated with vertical bars and flashes the appropriate color for each item.

If you are using the program with other users on a network, you will see this window whenever they make changes. Sometimes you will see it also after Adding or Editing items. If this is too intrusive then click the Stop Showing button.
If you try to Add or Edit items when someone else already is then you will see this message. You can wait a little while or click cancel and try again later.

There are four basic mouse uses with the scrolling window:
- Double-click to use the Edit/Delete options
- CTRL Double-click to Open any item Link
- ALT Double-click to Add a new item
- Right click to use the item menu
The easiest way to learn the program is to edit the demo items and see the results. Whenever there are no items or no dated items that match then the scrolling window will disappear.