Sit-Stand-Stretch – a program for greater mobility

For close to two years, I have been using a standing computer desk while at work. After reading multiple articles on the dangers of too much sitting, I decided to give this a try. It has worked pretty well, but, I started noticing a couple of varicose veins in my right thigh several months ago. I’ve never had varicose veins before. Recently, they got worse, so I started Googling “standing and varicose veins.” Well, it didn’t take long to find out that too much standing is a common factor in getting varicose veins and can also cause other health issues.

Well, dang, here we go again. I naturally started sitting more during the day. Then I found a Cornell University study which suggests the following routine:

  1. Sit for 20 minutes.
  2. Stand for 8 minutes.
  3. Stretch or move around for 2 minutes.
  4. Generally repeat this cycle during the day.

Here is a link to the Cornell Study findings.

A new program has been created to remind users to go through this Sit, Stand, Stretch cycle.

(Nov 4th, 2018) The setup for version 1.03 of the program is here Sit-Stand-Stretch-setup. Just open and run the included setup application. It will place the program into your Desktop folder. The shortcut appears as below.

When the program is started, it begins a new Sit phase of 20 minutes. It will remain onscreen or users can click Hide. It will also show how many minute/seconds the current phase has been running and its button is in bold text. The counters underneath are just for general information. Users can restart any phase by clicking that button.

After 20 minutes, a window will display saying it is time to Stand. Until you click OK it will remain in the Sitting phase. [v1.03 important change – in the latest version, all the prompts have OK and Cancel buttons. If you click OK or press the Enter key, the program will advance to the next mode. If you click Cancel or press the Escape key, the program will restart the current mode. And after the prompt closes, the program sets the focus to the last active window.]


And after 8 minutes of Standing, a prompt will appear reminding users to Stretch and/or Move for a least 2 minutes.


When the 2 minutes of Stretching is done, the next prompt is to start Sitting again for 20 minutes.

So, this cycling of Sit, Stand, Stretch continues until you exit the program. If the computer goes into Sleep or Hibernation, upon Waking, the program will start in Sitting phase again.

The program window can be placed on top of other windows by right-clicking on part of it or by choose “Always On Top” from the taskbar menu. Using “Always On Top” removes the title bar of the Window, which is just a visual indication that it is turned on.

Use the left or right mouse buttons to activate the system tray menu.

Users can turn on/off “Always On Top” and can click on the Hide button to not show the main window. [v1.02 additions are: 1) Transparent – choose this to make the program see through and 2) Run Silent – choose this to turn off all program prompts (the icon will turn white and black while the program is silenced).]

Clicking on About on the main window will display the following:

Click “link to the study” to see the original study from which I got the information to create this program. Or click “Blog page” to browse to the program’s home page.

The “Show Window” menu option will always display the program window in its last position. If the window has gone off-screen then choose “Restart Program” to center it.

That’s about it, feel free to leave comments and/or suggestions.

Cheers!

InfoWarp – A small multipurpose launcher with text store, hotstring and reminders capabilities

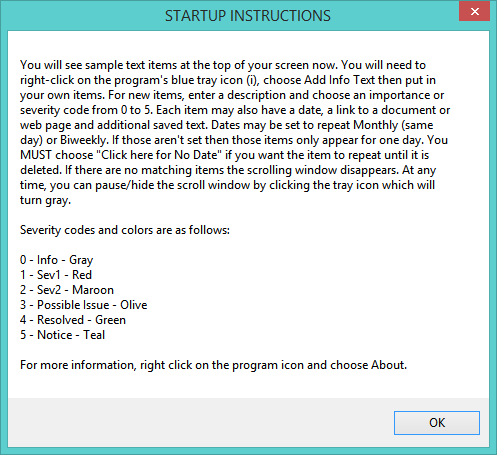
InfoWarp – A Multipurpose Windows Launcher

Synopsis: This program’s first use allows users to collect their most used programs, web links, documents and folders into a small grid so they can be quickly launched or switched to if they are already running. It’s second use is to let users add textual items which are displayed when the mouse passes over them. The third use of the program is the creation of Hotstring items. The fourth use is to add popup Reminders to any Text items. A Hotstring is a short sequence of characters that expands to a phrase or even several paragraphs after being typed.

The program is a Document, Folder, URL and Program launcher with these capabilities:

  • Manage and Launch all the types of Windows shortcuts: Files, Folders, URLs, Programs.
  • Launch any item via mouse, keyboard or a Hotstring.
  • Create Hotstrings to enter standard texts with a few letters.
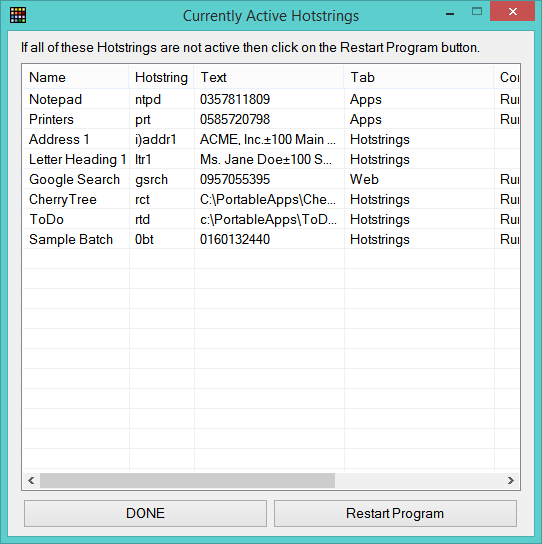
  • Display the current Hotstrings.
  • Add Reminders to any Text items.
  • Display the current Reminders.
  • Display and open Recent Files/Folders.
  • Store and quickly display or search on Textual items.
  • Display a Rich Text editor for quick notes via the F9 key.
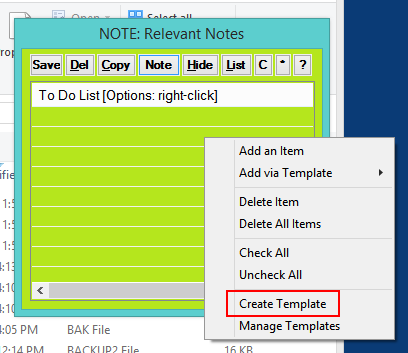
  • Set items on any Tab to have characteristics of typical ToDos or a Kanban board.
    (These items can be moved Left and Right via right-click to change their status from ToDo/Backlog to Doing to Done. For Kanban items, several other status codes can be set and the text color will change. Mousing over the items will also display their status.)

Updated to v1.54 on 12/15/18: Added additional Statuses for Todo, Kanban items that are also color-coded, Moved Display items into Tools Menu bar. Added Display ToDo/Kanban report in Tools menubar. Added Display Basic Statistics report in Tools menubar. Fixed Resetting of Text Colors after a Reset Found is done. Sorting now leaves ToDo and Kanban Tabs alone and also does an Auto Backup before it starts. Small change on Silencing Reminders during Sleep/Awake, updated Stats report. [Also switched to a different file compressor to cut down on false positives from antivirus programs.]

Updated to v1.45 on 10/14/18: Fixed: some minor issues and brought back the use of Icons in the program’s menus because I like them. If an older computer doesn’t have some of the icons, no errors will be displayed. Fixed: The status bar now displays Double-Click here to enter Edit Mode whenever the mouse is not over a button. Added: some more help text in Features and an option to go to the Blog Page from the Tray menu. A few screen shots in this page have also been updated.

There are two installation options:

    1. Here is a Setup Zip file which runs a traditional installation program. This version should be less prone to setting off antivirus warnings. It will place InfoWarp and a sample file into your Programs folder. setup
    2. Here is a Zip file with the InfoWarp program and a sample file that you can drop into any folder you like. InfoWarp

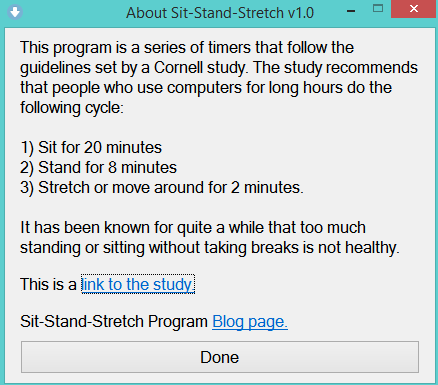
While looking through some free software sites, I came across an older program called Pigeonhole Organizer. It allows users to store a lot of text through small labeled buttons. As the mouse is moved over buttons the underlying text is automatically displayed in a pop up window. Users can drag items around, color them and search them. A link is here pigeonhole. In my opinion, this is a pretty neat idea, but way too many buttons on one page.

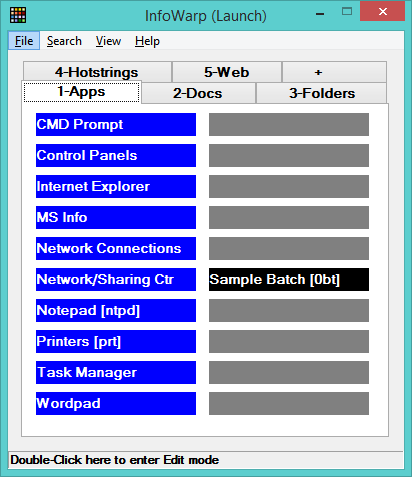
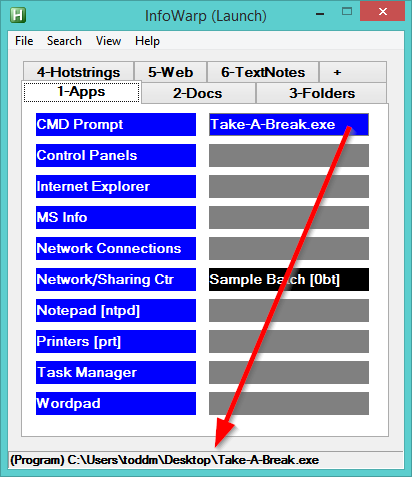
Since that program hasn’t been updated in 11 years, I decided to write something similar in AutoHotkey. In this version you start with 30 items  in three columns of 10. The font style and size are adjustable. Users can select from 1 to 6 columns. Also, to make it more versatile, additional Tabs can be used to help organize items. The screen shot below has several Tabs organized by the type of items.


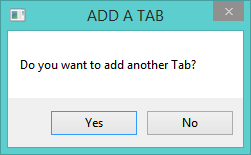
Clicking on the + tab will prompt to add another tab.

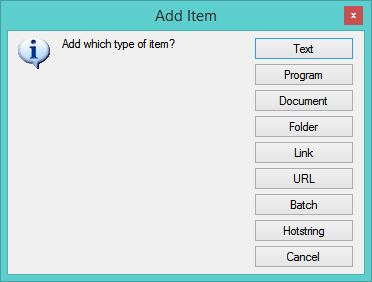
The program lets users click on any empty (gray) item and create one of the following:

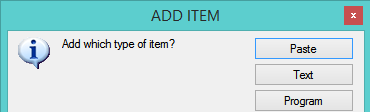
  1. Text item – users type or copy/paste into a small text box. This box will automatically display as the mouse moves over Text items. You can also turn on a capability to Monitor Clipboard Copies which enables you to select then copy text (Ctrl C), the program will see the new text on the clipboard and prompt you to create a new Text item. If you click Yes then that text will become the new item. This feature is not intended to remain on always, but, just when you are trying to quickly build up Text items.
  2. Program item – enter the program name and click the button to select the desire program OR just drag and drop the program icon over the InfoGrid.
  3. Document item – same as number 2, drag and drop is easiest.
  4. Folder item – enter manually or drag and drop.
  5. Link item – shortcut files (ending with .lnk) can link to any of the above items and are converted to one of them.
  6. URL item – these files are created by dragging from the address bar in a browser into a folder.
  7. Batch item – if you want to launch many of your items with one click, just create a batch item and it will let you check mark any set of items to launch. It’s a great time saver and won’t relaunch items that are already open.
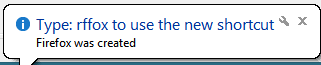
  8. Hotstring item – hotstrings are short sequence of characters that are replaced by much longer text. For example, typing addr1 can enter the address below. Hotstrings can also be used to launch any item.
    ACME, Inc.
    100 Main Street
    Anywhere, USA 00000

Users can edit, delete, cut and paste items. Since the program allows for additional Tabs (page of items), items can be Cut the moved from one page to another. After clicking Cut click the empty location where you want to move that item to and you will see an additional Paste option.


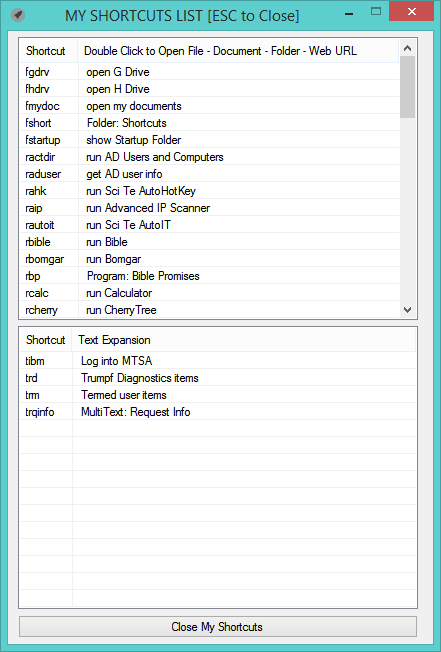
Item are colored as follows:
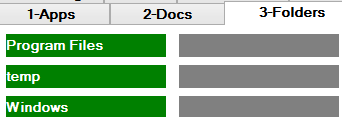
Green – Folders
Dark Blue – Programs
Light Blue – Text items (mouse over to reveal their contents)
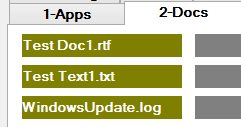
Olive – Documents (Word, Text, Excel, etc.)
Purple – Hotstrings (Text inserted with just a few letters)
Black – Batch item (allows many items to be run with one click)

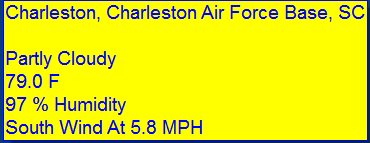
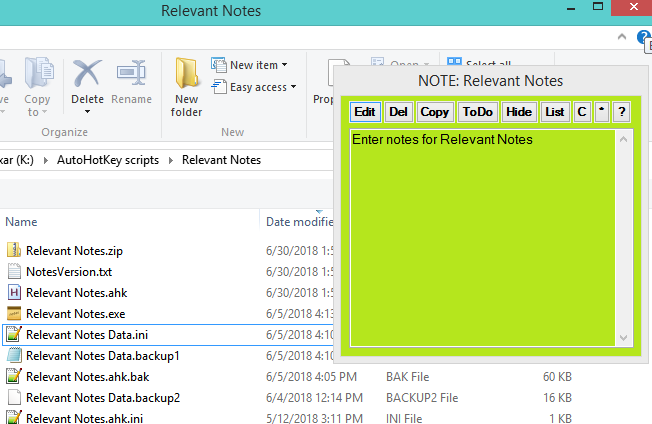
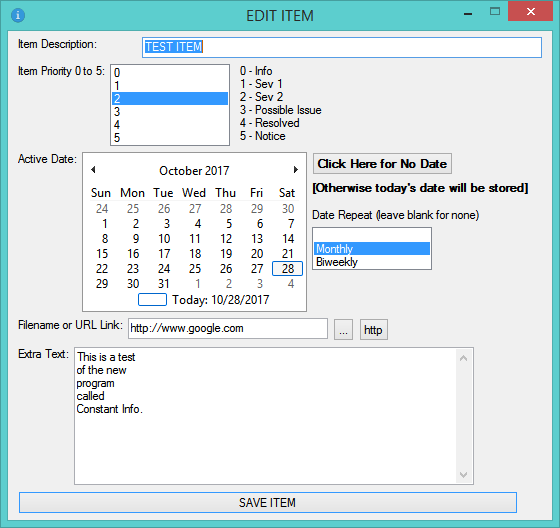
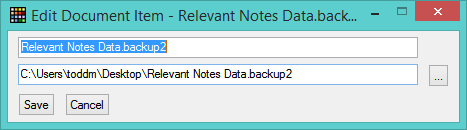
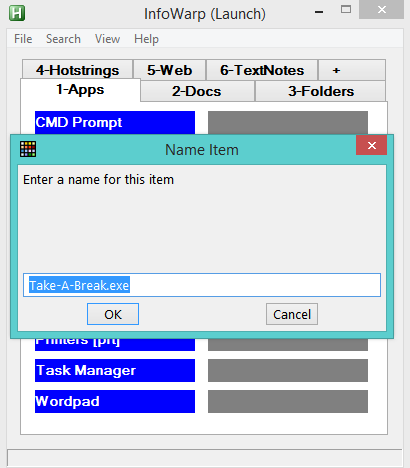
Adding a Text item – click an empty item then choose Text. This window will be displayed. At your text item name and contents then Save it.


When you mouse over any Text item, it’s contents are displayed.

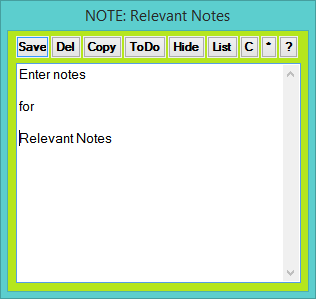
If you need to resize the window or grab any text from it then press a Shift key or double-click the status bar to enter Edit mode. You can do anything with the window until pressing Shift again to leave Edit mode. The status bar and window title will change to let you know when you are in Edit mode.

Program Menus

The program’s menu options are easily understood.

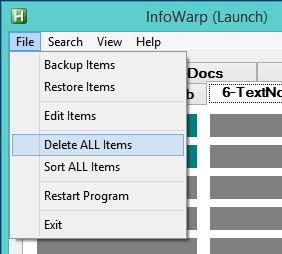
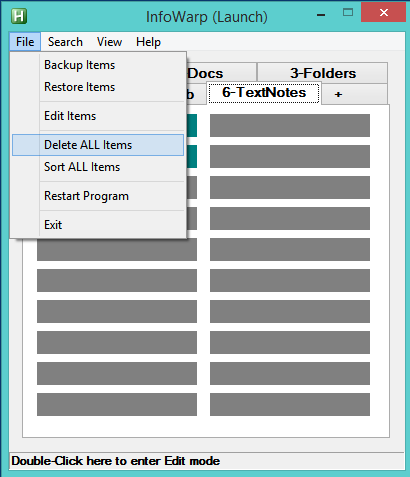
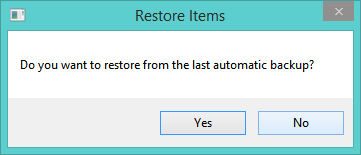
Users can backup and restore their items file to/from any folder. All data is stored in InfoWarp.ini which is in the same folder as the InfoWarp program. An Auto Backup is also done every minute to your Temp folder in case you delete items you didn’t mean to. To do an Auto Restore, just right-click on the Tray icon and choose that option.


You can Delete ALL will start with an empty grid, if desired. Sort ALL will sort each Tab (page) individually by the items names.


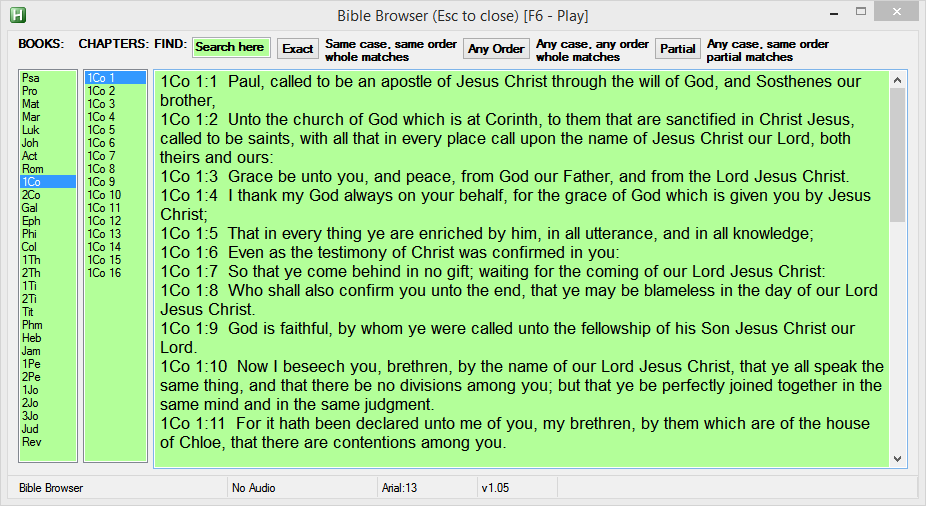
Choosing Find Text Only will ask for the search text and highlight items that match. When the mouse moves over items containing matching text, the program will select the first match. Below the word Hotstring was searched on.

Find Any search item names, folder names, text, etc. on the current Tab and highlights them.


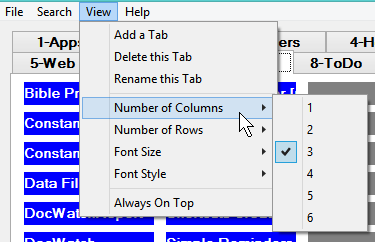
Users can Add, Delete and Rename Tabs from the menu or by double-clicking an existing Tab or using the menu. The font size and the number of columns are also changeable. When going to a lesser number of columns the program will prompt to Sort items and it will let you know if not all items will be displayed. Items will not be lost by Sorting or reducing columns.

Drag / Drop interface to add items

Dragging a program shortcut onto InfoWarp displays a prompt for the name you want to call it. Then it is added to the grid where you dropped it or in the first available empty spot. You can select a lot of shortcuts at one time and drag them over the grid. You will be prompted for a name for each item, the default will be a short name based on the item’s filename. Once a grid is full, you will be prompted to add another column. The program can maintain up to 6 columns. Or, you can add additional Tabs or pages which can keep the number of columns small.

Launching items just with the keyboard

Users can press Win-Alt-I to show the program, then press the number of the Tab they want to display and then press the Space bar to show letters by each item. At this point, pressing a letter will launch the desired item. [If you get here by mistake then press the ESC key to remove the letters.] Clicking on other Tabs or pressing numbers is disabled until you type in the letter of the item you want or press ESCape. This behavior is normal. The picture below (camera shot) shows the quick access letters. My apologizes for the quality. While InfoWarp is waiting for a quick letter to be pressed, I was unable to take a normal screen shot.

For non Text items, their path is displayed in the status bar while the mouse is moved around. This is helpful if the item name isn’t self-explanatory.


Users can drag any type of shortcut, program or folder over the main window and it will create corresponding items.

Creating Hotstring Items:


For the Address 1 Hotstring, it was created as shown below:

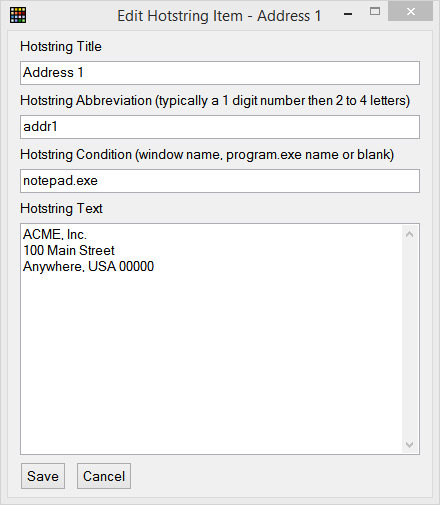
Typing addr1 will send the address text to whatever program that is active. So, typing Addr1, addr1, ADDR1 will all cause the Hotstring to fire. If you want a Hotstring to only be active in a particular program then enter its name under Hotstring Condition (i.e. notepad.exe would only make a Hotstring active in Windows Notepad, as above).

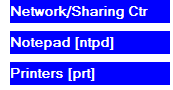
To create a Hotstring for a program, folder or document, simply place the Hotstring inside brackets as shown here. Typing ntpd will run Notepad, typing prt will display the Printers Control Panel. *IMPORTANT* If you create a Hotstring and it doesn’t immediately activate you can go to File, Restart or Search, Display Hotstrings and click on Restart to reactivate all Hotstrings.


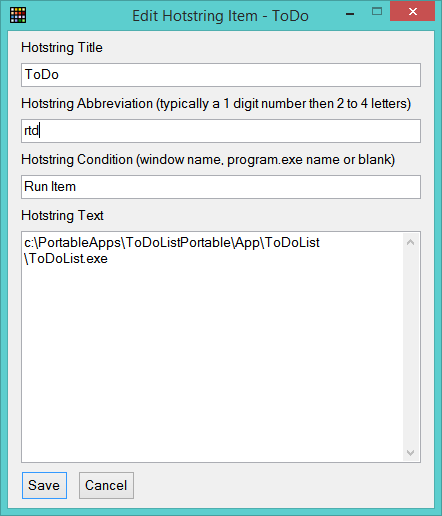
You can also create use a Hotstring to launch a program as shown below. Normally, it’s better to drag and drop programs to create their items. But, for some portable applications, the program used to launch them is not the same name as the program themselves. In the example below, the program is started with PortableToDoList.exe which runs ToDoList.exe. This causes switching to ToDoList to not work properly. But, one can add a Run ToDo (rtd) Hotstring like this and it will activate any running copy of ToDoList.

* Additional more powerful Hotstrings in version 1.30 *

In this version Hotstrings may contain commands that move the cursor around, click the mouse and activate other keys like Ctrl, Alt, Win and Shift.

If you wanted a Hotstring to always move to the top of your document before entering text, you can use ^{Home} to do a Ctrl – Home command. The Hotstring would look like:

^{Home}To whom it may concern,{Enter}{Enter}This is a test letter for anyone.{Enter}{Enter}Sincerely,{Enter}{Enter}

This would produce:

To whom it may concern,

This is a test letter for anyone.

Sincerely,

The underlying AutoHotkey scripting language has a Hotstring section with lots of help info online.

Adding Control Panel items:

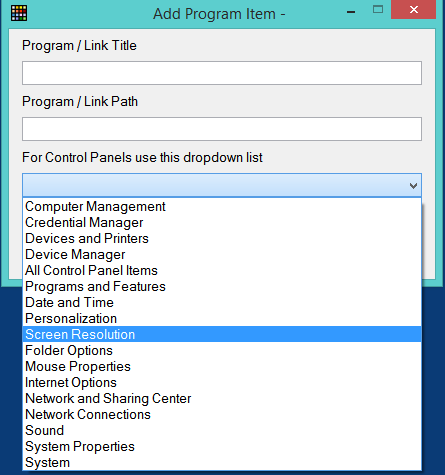
When adding a Program item, you can select from a bunch of Windows Control Panels or click the button to navigate to a program to add.


Adding Batch Items:

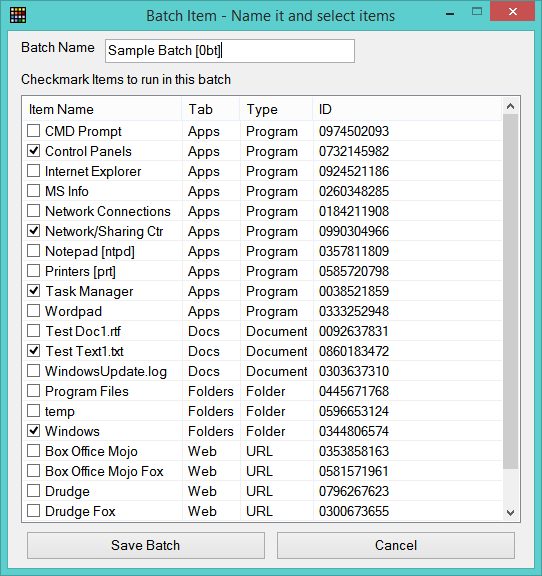
Creating a Batch item will display all items for you to check mark the ones that are part of the batch. In this instance, Sample Batch is the name and it will run the checked items with a click or by typing 0bt which is its Hotstring. Every item has an ID assigned to it, so if you move items to different Tabs, batch items will still work properly.


New Hotstrings do not always activate but you can Restart the program to take care of that. Using the Search, Display Current Hotstrings will so the ones you have created.


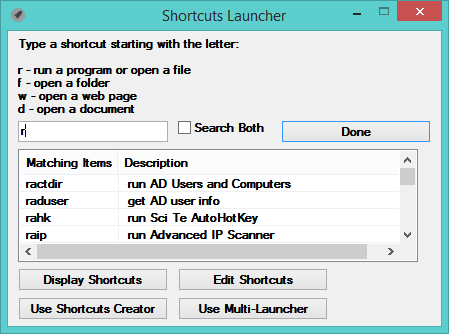
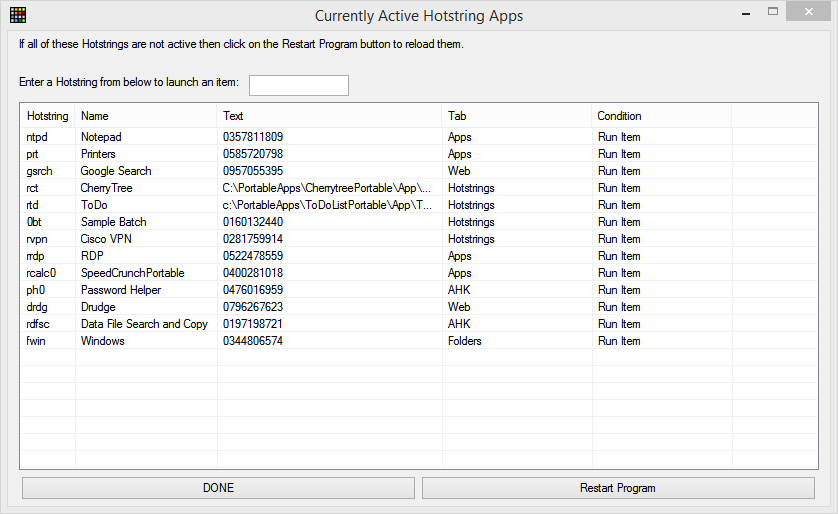
Using the Hot Apps Launcher v1.23+:

Since the typing of Hotstrings can interfere with some applications or overwrite say a cell in Excel, users can press both Shift keys to display the Hot Apps launcher window. From here, just start typing a Hotstring. When a complete Hotstring is entered this window will close and the application will be launched.

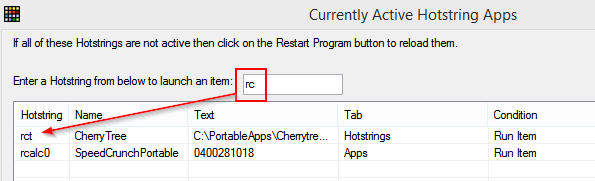
If you start typing a Hotstring, the list will narrow down. Once you have entered a complete Hotstring that item will launch.

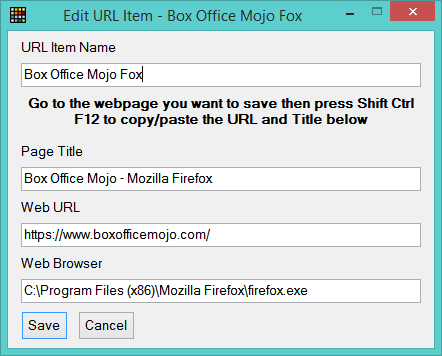
Adding Web Pages (URLs):

For web pages, most users will just save bookmarks and/or several start pages and be just fine with that. But, for the sake of completion, I added the launching of Web pages via their URLs as well. URL items only need a name and a URL to launch a web page. If the web page title and browser are saved the program can crawl through all open web pages looking for the one you want before opening a new browser tab. To store the extra info, just press Shift Ctrl F12 when the web page is active. Some web pages don’t work in every browser so this lets users specify the browser to use to fix that issue.


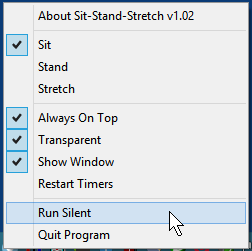
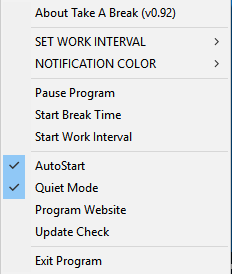
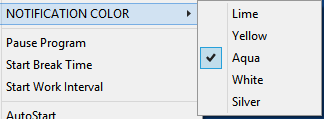
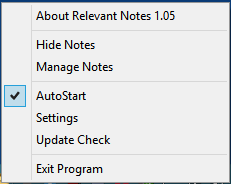
Certain settings can be changed or turned on and off if you wish by right-clicking the Tray icon and by using the program’s Menu bar. Items starting with AutoStart are either checked or unchecked and are remembered when restarting the program.


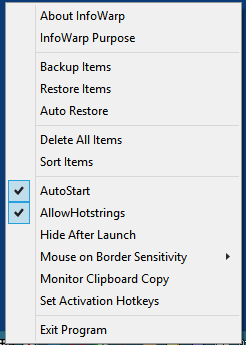
New v1.23 menu items are in Red.

The menu setting called Window Follows Mouse is for users that have 2 or more monitors. If this is turned on whenever the program window goes from hidden to shown, it will appear next to the Mouse pointer. So, if you have two monitors and the mouse pointer is on a different one since the program was last made visible then it will move to that window. (Using Win – Alt – I, double tapping Ctrl or Alt keys or whatever hotkey you have set.)

There is more information in the program menus and also a Tutorial section.

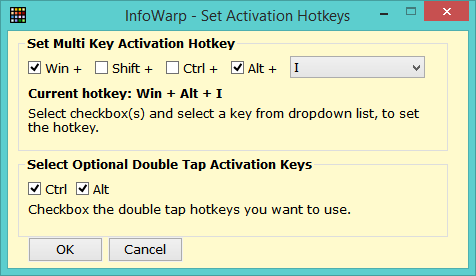
Since InfoWarp is primarily a launcher, it can be set to hide when items are clicked or by clicking on its Tray icon. The default Hotkey to show/hide the program is to press the Windows, Alt and I keys together. You can also turn on double tapping the Ctrl and the Alt keys to show the program.


Several settings will restart the program (deleting Tabs, sorting, turning Hotstrings on and off, etc.) which is normal.

To summarize, the two main uses of InfoWarp are to launch programs, documents and folders AND to store lots of frequently referenced text for rapid display. Please read through the purpose, features and the Tutorials for more information.

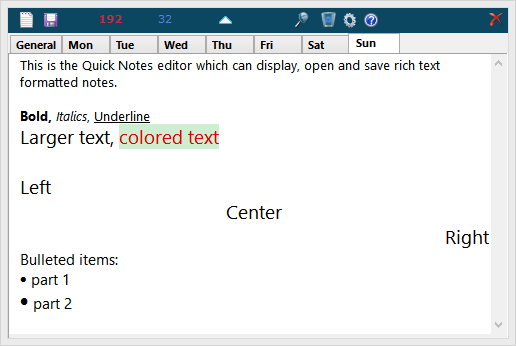
The new Quick Notes editor in v1.33 is accessed from the menu bar or the tray menu or by pressing F9. All of the most typical word processing formatting is available in this window. You may use up to 16 tabs (notes) and click on the Gear to set names for them. If you use week days for names then pressing F8 will take you to today’s note. Pressing ESCape or clicking on the X will save changes and hide the window.

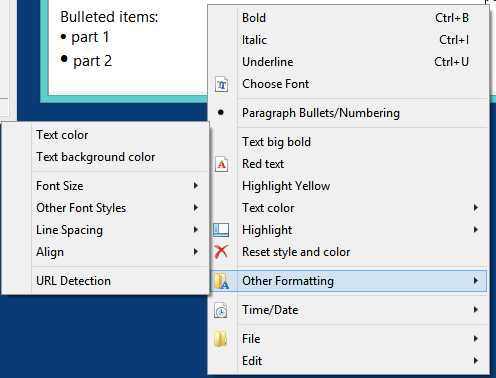
Right-click in the window for the formatting menu.

Click on the (?) in order to see quick help.

Clicking on the magnifying glass will display the Find Toolbar so you can search for text.

Additions for v1.41:

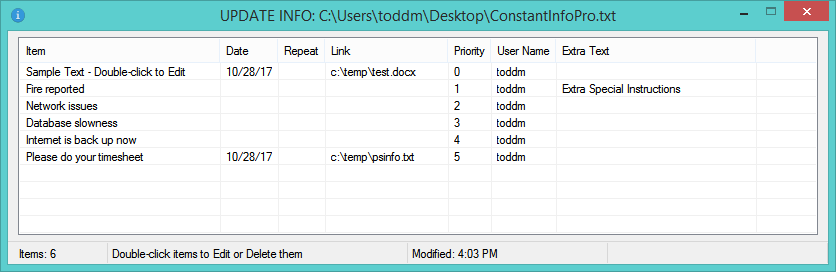
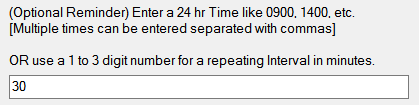
Setting and Displaying Text Reminders –

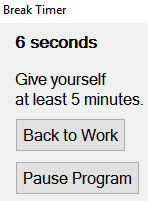
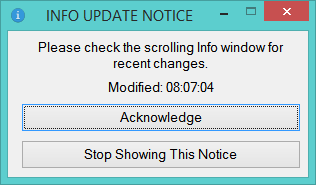
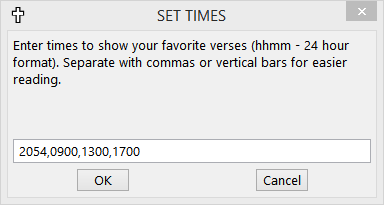
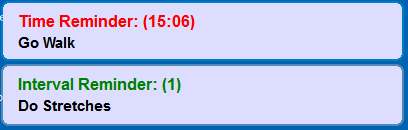
Adding a time or an interval to a Text item will cause a popup to be displayed.


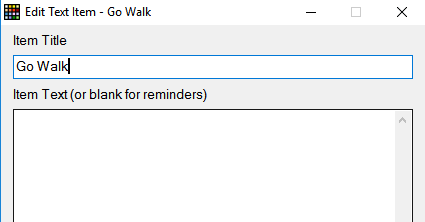
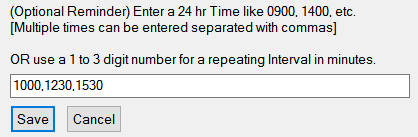
This will display popups at the bottom of monitor 1 as below. Click on reminders to close them. You may silence Reminder popups by choosing Silence Reminders from the right-click tray menu.

ToDo / Kanban tracking –

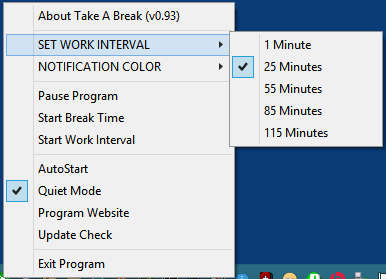
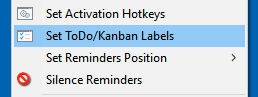
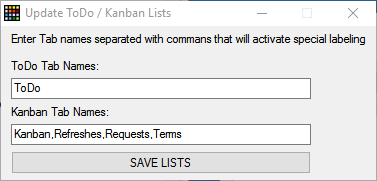
By naming Tabs specifically, tracking of simple ToDos or Kanban flow can be done. In a two column setup, ToDos will start in status TODO then change to DONE when they are moved to the right. In a three column setup, Kanban items will start in TODO status and go to DOING then to DONE by moving them to the right two times. Right click items to move them Left or Right to the topmost empty cell. The default Tab names for this feature are ToDo and Kanban. Other names can be entered with Set ToDo/Kanban labels on the Right-click Tray menu. This is shown below.


Kanban items work the same way, but, require three columns for TODO, DOING and DONE. This labeling merely helps users to remember the status of each item and is not part of the Item’s name.

*New* Additional Kanban status codes are available. Right-clicking on a Kanban item will display other codes you can use to track progress on it. If you use any of these status codes, the item’s text color will change. You can switch back to the simpler Column based status as long as you have at least three columns for Kanban items (Backlog, Doing, Done). Using these status codes allows you to have fewer columns and still track the items.


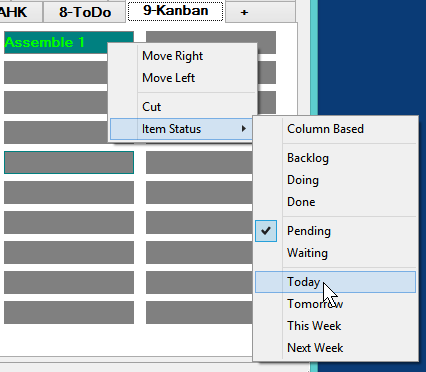
ToDo items have less additional codes.

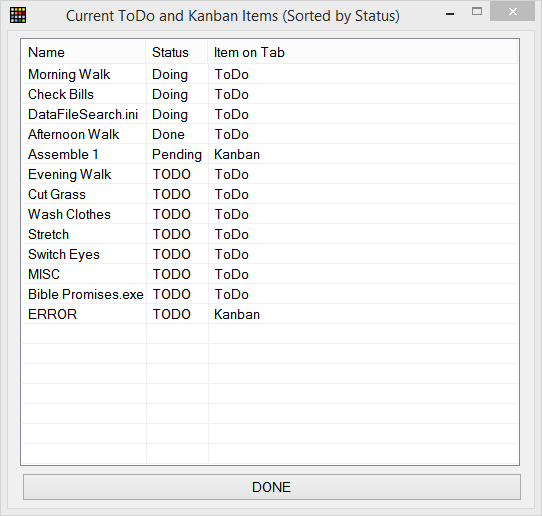
*New* ToDo/Kanban reports from the Tools, Display Current ToDos/Kanbans option.

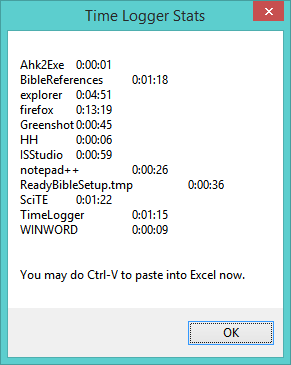
*New* Statistics The program can now display a summary by item type by choosing Display Basic Statistics from the Tools menu.

Please feel free to leave comments and suggestions.

Weather Info Plus – quick local weather app

[Minor Update 8/17/18 – Version 1.0 download of Weather Info Plus is here: Weather Info Plus]

While reading some articles on my favorite scripting language, AutoHotkey, I ran across a few lines of code that demonstrated how to retrieve weather data from the National Weather Service website. That site includes weather data from about 2,500 locations, but, I am trying to find other free data as well. (You can run the program from any folder, it only requires another file called WeatherInfoPlus.ini)

It was easy enough to do a quick script to display the nearest airport weather so I started fleshing it out into a regular application. I added some motivational quotes (every 20 minutes) also. And, if your computer is very busy or running low on RAM memory, the program will display alerts for those as well.

When you run the program, you will need to set a weather station location that is closest to you. After that, you will see updates every 15 minutes and random quotes every 20 minutes. You can turn the quotes and PC stats on or off. If you miss a weather popup you can always place your mouse over the program’s icon in the taskbar. It will display the last weather update from there.

The Weather Background/Foreground colors for Pop-Ups are as follows:

Green/Black – less than 95 degrees, less than 90 percent humidity
Yellow/Maroon – high index tempatures >= 95 degrees
Yellow/Blue – high humdity >= 90 percent
Aqua/Blue – raining
Aqua/Fuchisa – thunderstorms or hail
Blue/White – snow

The Tray icon’s colors will correspond to those above.

If PC Stats are active then you will see small popups when:

CPU usage is >= 95 percent busy
RAM usage is >= 95 percent used
Swap file usage is >= 95 percent used

Quotes are displayed every 20 minutes if active.
Mouse over the tray icon to see the last weather stats.
Clicking the tray icon will turn off all popup items.

Some  screenshots are below:


For those who like it and want to tweak it more, they can set over values as shown below.

TimeLogger – For the curious

For those curious as to just how much time they spend in different applications, feel free to download TimeLogger. It is a very simple program that just keeps totals for each application you work with.

Clicking it’s icon will show or hide the TimeLogger window. You may Pause it for program you don’t wish to time. When you exit the program, it creates a comma-delimited file that you can import into Excel, or you can just do Paste (Ctrl-V) into any application right after you quit TimeLogger.

You may download it here. TimeLogger

Click the icon in the Taskbar after running the program displays it’s window.

Right-clicking the tray icon shows this menu. You can Pause the program from here.

When you exit the program, you will see a summary window.

I am working on Windows Logger which will allow times to be accumulated by Window Titles and/or program names. You will also be able to categorize timed windows for project work.

Take-A-Break (reminders to frequently leave your computer)

[Version 0.95 is available here (Take-A-Break). Just open the ZIP file and copy to your desktop. The program creates a Take-A-Break.INI file in your Documents folder just to save a few settings.]

The newest version provides menu options for setting the location of notifications and lets users display 1 minute countdowns during Work intervals. The program also shaves 5 minutes from the work intervals so if users only take a 5 minute break they can keep on track with meetings or other scheduled events.

After reading more articles about how people don’t take enough breaks from working at their Office or Home office computers, I decided to write a quickie application to remind them to get up and leave their computers every so often. As with any reminder program, users have to make up their mind to ‘obey’ the reminder notices. And that can be a difficult thing to do.

The new program is called Take-A-Break. When it is first run, this information window will be displayed.

Take A Break defaults to 25 minute Work intervals and recommends 5 minute breaks until users select a different value. Users will see this notice at the start of each work interval. This notice will disappear in a few seconds.

After 30 minutes, a Break timer window appears requesting users leave their computer for at least 5 minutes at a time. The Break timer window remains on screen to show how long a break users have taken. The window will not interfere with any typing in progress and can be moved to any position.

When you are ready to go back to work, just click ‘Back to Work’ and the 30 minute timer will start over. If you have a meeting or need to pause the program then click ‘Pause Program.’ The tray icon is Green for Work, Gray for Break time, and Dark blue for Paused program.

If you wish to change the Work time interval then right-click the program’s tray icon and choose a different value. This value will become the default until you change it again. The 1 Minute interval is just so users can quickly see how the program works. Quiet Mode simply disables the double beep that normally is heard when it is time to take a break. [v0.92 allows users to go to the Program Website and to do Update Checks for new versions. The program will check up to one time a day for updates automatically.]

From this menu, you can also do Pause Program, Start a Break or Start a Work Interval. You may also choose AutoStart so that the program will run automatically the next time you sign onto your computer. The ‘About Take A Break’ will re-display the basic instructions.

Left Clicking the program’s tray icon will either do Pause Program or Back to Work.

From your keyboard, you may also press ESC to close the Break window and start Work. And you can press Shift-ESC at any time to go into a new Break. These two key settings will probably be user changeable in the near future. But, from experience so far they don’t appear to interfere with normal Windows applications.

Users can now set the background color of the Notification messages via the menu.

That’s all there is for this reminder program. I have tried to keep it very simple and effective.

Relevant Notes – Another tool for tracking work in progress

[* UPDATE 6/30/18 – Relevant Notes v1.15 download is here. Relevant Notes]  Just Exit Relevant Notes, open this Zip file and copy the executable to the same folder as earlier versions. You can also select Update Check and if a newer version is found, you can have the program open it for you.

v1.076 – 05/28/18 – Added optional checklist to each Note and made the window 320 pixels wide
v1.08 – 05/30/18 – Updated To Do list feature so colors and font size are changed properly and the Lists are saved automatically
v1.09 – 05/30/18 – Added ability to save templates for the ToDo lists that can be selected by right-clicking a ToDo list for a Note
v1.10 – 05/31/18 – Added ability to view and delete templates under Manage Templates
v1.11 – 05/31/18 – More tweaking of saving Notes and ToDos, especially for multi user
v1.12 – 06/01/18 – Fixed issue with disappearing Note window when ToDo was clicked
v1.13 – 06/04/18 – Filter out Templates in Manage Notes window and blank entry in Manage Templates
v1.14 – 06/04/18 – Changes INI section Templates to -Templates- in case users use that word in their ToDo templates
v1.15 – 06/05/18 – More tweaking, users can add, edit, delete Templates with right click now

For network users, the newest release adds saving of settings, last color and font size into their PC’s Registry file. In this way, network users can change any of those settings independently of other network users.

For all users, the Notes window now has a C button for settings Color/Font size for the current note. And those changes are made the default for the next created Note. The ? button was removed and that information is accessed from right-clicking the Relevant Notes icon on the task and choosing About.

A short demo is below. 


For the last couple of years I have looked at several programs which manage computerized versions of paper Sticky Notes. Programs like Stickies 9.0, PNotes, Stick-A-Note and others are well made and have lots of features. But, I decided I would write my own program at some point.

About a week ago, I got started on the project and came up with what I call Relevant Notes. The program is very small and allows users to attach Notes to any window, webpage, document or folder. On startup, users will see the instructions below. Clicking on the Website will take users to this Blog page.

Notes can independently be resized and positioned, have their background color and font size set. When creating new notes, they will use the last settings a user selected. Below is an example folder with a new note created by pressing CTRL-ALT-N.

By design, the creation of a note does not move the cursor from whatever you are doing. To edit the note text, click the Edit button.

Users can click Save or when the Note is closed, it will be saved automatically.

You can also create and use a To Do list for every Note. You must first create one or more Templates. Right-click on the Tray menu or after clicking the ToDo button then right-click as below.

Edit the Template Title and add your list like below.

After you save the Template it will appear in the Add via Template submenu. You can also Add and Delete items one at a time.

After selecting a Template, the list will appear with check boxes. Switching between a Note and its To Do list saves either. But, I like to click on Save anyways.

Other options for notes include: Delete, Copy (clipboard) and Hide (temporarily). Users will be prompted for some of these.

If you need to change the default Hotkey then go to Settings from the tray menu or click the asterisk (*). If you use files on flash drives you can check Ignore Drive Letters to not include it with the note title. This way the note will still appear when using the flash drive on different computers.You can also set the delay time or sensitivity which is how often the program checks for window changes from a quarter of a second to one second. The default is 250 milliseconds. If the program is run from a network folder then setting the Network Update Check may be important.

Clicking on the question mark will re-display the Help information.

As users click different windows, only one Note can appear, if the current window has one attached. This means that note is relevant to that window. All notes may be hidden  by clicking on the Tray icon or right-clicking the icon and choosing Hide Notes. Once you are comfortable with the program, it can be set to Auto Start from the same menu.

If notes become separated from their parent windows (document, folder, web page), users can delete them using the Manage Notes menu option or by clicking on List inside a Note window. The Manage Notes window appears as below. Notes are sorted by their attached Window Titles with contents shown as they are clicked on. Right click any title and choose Delete to remove a note. There is also a Manage Templates window just like this one but filtering on Templates.

All notes are stored in the same folder as the program in a file called Relevant Notes Data.ini, so don’t delete that file!

[Network Support]

Starting with Version 1.06 there is basic support for sharing notes from a network location. A small work group can now create and share notes for networked files, folders and web sites. There will be a more noticeable delay when creating a note but other users will see them quickly. The program will check every 5 to 15 seconds for changes to the Notes database and update any onscreen Note if needed. Users may see a file is being edited message box but it should be rare. *THIS IS NOT INTENDED TO BE USED HEAVILY ON A NETWORK* but from my testing it should work adequately. In order to avoid saving lots of file changes, the size and position of notes is not saved. You may temporarily move/size notes but the next time a note is displayed, it will be in the upper right corner of its parent window. This is because some users have one monitor, some have multiple monitors. The program re-positions notes because of this so that for any parent window, its associated note will be visible. Some of this positioning is still being worked on.

Starting with Version 1.062, if a different Hotkey for the network run program is chosen then users can run a local copy of the program as well. There could be two notes displayed for a file or folder, just keep that in mind. Network Note windows display •NOTE: instead of NOTE: to denote it is a network stored note. When displaying the List  of Notes, the title will show whether they are Local or Network. Have fun trying out the new features!


Constant Info – Notifications and Reminders for one user or for small groups

Click here to download Constant Info Pro. 

[If you wish to try the SQL Version click here. Constant Info Pro SQL. It will place sqlite3.dll into the same folder when you launch it. That DLL contains the SQL functionality required for this version. There are some different prompts in this version.]

[Version 1.58 (01/06/18) – Changed Info Update window to remove Bold text, reduce the font size and added a “Stop Showing This Notice” button. This function is the same as choosing “Suppress Update Notices” from the program’s right click menu.]

Version 1.57 (12/23/17) – A lot more testing and tweaking since version 1.52. Version 1.51 (11/17/17) Fixed: An issue with some repeating items showing as blank. Tweaked file saving. Version 1.50 – Added un-hiding of the scroll window and items whenever a computer comes out of Sleep or Hibernation. Version 1.48 adds Advanced Notification of dated items and Weekly repeats. After extracting the Constant Info Pro program from the Zip file, just double click it to run.

After completing the first release of Constant WORD, I kept thinking there was some other uses for displaying text in a banner (ticker) format. At work, we use a program to track our tasks and it categorizes tickets by severity or importance and by location. We frequently get emails related to big issues going on or for upcoming changes.

I felt the banner format could be used as an early notification system for teams or work groups. Using severity codes 0 to 5 the program can display important items (issues) and let users know how quickly they need to be addressed or how widespread they are.

The program has grown since then to include more information. Users can now input the following:

  • Item Description – enter a short description of the reminder, task or issue. This text is what displays in the scroll window.
  • Item Date – (displays on a specific date unless Repeats are used) which can also be left blank in order to continue showing the item until it is deleted.
  • Item Repeat – (blank, Monthly, Biweekly or Weekly). Monthly displays the item on the same day of each month until changed. Biweekly displays the item if today’s date is a multiple of two weeks from the stored date. Use Advance Notices from the menu to see items 1 to 7 days ahead of time.
  • Item Link –  Users can click on the three dots button (…) and then select a file or click on “HTTP” to have the program enter http:// into the link field. Copy/Paste any desired web link into the edit box. When items are being displayed, they will be surrounded with asterisks if a link is present (i.e. *This is a test*). Users can right-click the item and choose Open Link or hold down the CTRL key then double-click the item to open the linked file or web page.
  • Item Priority – Choose a number from 0 to 5 to prioritize the item. This number determines what color the item is displayed with.
    • The colors are as follows:
      • 0 – Info – Gray
        1 – Sev1 – Red
        2 – Sev2 – Maroon
        3 – Possible Issue – Olive
        4 – Resolved – Green
        5 – Notice – Teal
    • Items may be prefaced with Labels or those may be turned off. [In a future release, Labels will be changeable by users.]
  • Item Extra Text – A much longer section of text detailing each item can be entered into this field. Items containing extra text are surrounded with brackets (i.e. [this is a test]). Right clicking on the item and choosing “Show Extra Text” will display the text in a separate window.
  • When items are added, the program also adds the current user name. This is only for display and isn’t changeable. It serves as an audit trail for team users of this program. However, it will be deleted when the item is deleted. Perhaps in the future a regular audit log will be kept separately.

When the program is first run, it will prompt for the folder you want to save the Info file into. The file is called ConstantInfoPro.txt.

The info file is created with sample data and starts scrolling at the top, middle part of the main monitor. You will also see these basic instructions:

At the top, you will see the scroll window:

Placing the mouse over the window displays some help text:

If an item has a Link or Extra Text, the popup window will note it. Right clicking on the window will display a small menu that is appropriate for the item. In this case, you can choose “Open Link” to display a local text file, if desired. You can always right click and Add new items and Edit all items.

If you are using the program for Reminders, you can clear a reminder in two ways: 1) delete the reminder or 2) right-click the reminder and choose “Hide this Item” to signify you have read it. Hiding items doesn’t delete them, it only hides them until you restart the program. At any time, you can unhide all hidden items by choosing “UnHide Items.”

Right click the window and choose “Add new Item” or use the menu option to add new items.

Double clicking on the window or choosing “Edit Items” will display the following list:

Double click an item to Edit or Delete it:

The Edit Info window has a number of options that make it easy to enter an item:

*IMPORTANT* – By using a calendar control to enter a date, remember that it will automatically insert today’s date UNLESS you click on the “Click Here for No Date” button. This will make sure the date is blank. If you want an item to only appear for a day then make sure the Date Repeat is blank. If you want to see an item the same day of every month then choose Monthly. If you want to see an item every other week on the same weekday then choose Biweekly.

For the scrolling window, you can change its Width, Location, Font Size, Font Style (Normal or Bold), add a Border, have the window Fade after 30 seconds so you can see underneath it (pointing to it will remove the fade) and change the scrolling speed. You can also hide or show the window by clicking on the program’s taskbar icon. The Ins, Delete, Home, End, Page Up and Page Down keys can be used to quickly move the window into 6 areas. Just click on the window first then press a key. If you have multiple monitors, mouse over the window, hold down the Shift key then drag the window to any screen you desire.

All of these items are in the right click menu. The all on One Line option is just an experiment. It shows items separated with vertical bars and flashes the appropriate color for each item.

If you are using the program with other users on a network, you will see this window whenever they make changes. Sometimes you will see it also after Adding or Editing items. If this is too intrusive then click the Stop Showing button.

If you try to Add or Edit items when someone else already is then you will see this message. You can wait a little while or click cancel and try again later.

There are four basic mouse uses with the scrolling window:

  1. Double-click to use the Edit/Delete options
  2. CTRL Double-click to Open any item Link
  3. ALT Double-click to Add a new item
  4. Right click to use the item menu

The easiest way to learn the program is to edit the demo items and see the results. Whenever there are no items or no dated items that match then the scrolling window will disappear.


The Constant WORD – scrolling Bible text

[Version 1.41 (11/10/17) add two menu options, Set Favorite Verses and Show Favorite Verses. Set Verses displays a Bible verse window from which you can navigate to any verse, click on any displayed verses and Add Verses to a memorize list. Enter Display Times like 0900,1300 for 9am and 1pm and those verses are displayed then.

Version 1.33 adds more colors and setting the scroll speed. Version 1.31 allows right clicking on Bible Trivia to display expanded verses. Version 1.30 now contains the Bible text so you can right-click on any popular verse to display its associated chapter text. Version 1.22 of Constant WORD allows for Audio playback by selecting Use Audio from the menu. The download is found here. Constant WORD]

Lately, I have been trying to think of what other ways Biblical information can be presented on a Windows PC. I have both Ready Bible Study which allows for full audio reading from any resource and a smaller Bible Promises application. Popup Bible verses and Christian quotes can be displayed with Ready Bible Study or another program called Popup Info. These popups are small windows displayed at user set time intervals.

These popups are good, but, another idea came to me. Why not use a small window with constantly scrolling text at one corner of the monitor. Using this technique helps us to do what Paul said in Romans 12:2, “And be not conformed to this world: but be ye transformed by the renewing of your mind, that ye may prove what is that good, and acceptable, and perfect, will of God.” Also in Isaiah 26:3 we are reminded, “Thou wilt keep him in perfect peace, whose mind is stayed on thee: because he trusteth in thee.”

Using three source texts that are part of my other Bible programs, I created a new application called Constant WORD. Operation of the program is very simple. When you first run it, you will see a randomly chosen Bible verse from among 523 popular verses in a small window at the top middle of your monitor. The text will scroll slowly and once it disappears the program will choose another verse. When you put your mouse over the window, it will pause and display the Book Chapter and Verse that is currently scrolling. The program run continuously until you shutdown or exit it.

When you click on the window then press one of the keys (Ins, Del, Home, End, PgUp, PgDn), the window will move. You can also use the program’s right-click menu to set the window location.

The program is quite configurable using its right-click menu. For text font, you may select Normal or Bold style, sizes 8 to 12 points and the width of the window in pixels from 400 to 600. For colors, you can select from several color schemes. The first color is text, the second color is the window background. For the window you can turn its border on and off, select its location and its width. In order to change the source text, simply pick another one from the menu. The program saves all settings but border and source text which default to None and Popular Verses (since the name is Constant WORD).

Clicking on the program’s tray icon which is a white Cross will pause the scrolling until you click it again. The cross color will change to denote it is paused. New in release 1.08 are a couple more Colors and clicking on the tray icon and the menu item Window Hide do the same thing now. Clicking the icon now pauses the scrolling and hides the window. The program will also stop scrolling if the mouse or keyboard has not been used for 30 seconds.

Some screen shots from the program are below. I look forward to any feedback or suggestions you may have.

About program window:

Sample scrolling window using white on green color scheme:

Putting your mouse pointer over the window displays information about the current item:

Right click a verse to display its chapter.


You can change source text at any time:

A different color scheme at bottom right position:

The program menu contains lots of user settings and a link to this web page:

New in release 1.04 are additional Color Schemes, Window Hide, Window Transparent and automatic Rotating between the three source files. In the above picture, if you click on Rotating, the program will switch to the file 2 Bible Trivia for 10 minutes then switch to file 3 Inspirational Quotes for 10 minutes then go back to file 1 Popular Verses. It will continue to do this until you exit or uncheck Rotating.

Clicking on Window Hide will pause Scrolling then Hide the window until you choose it again. It’s kind of like pressing the Boss Key from the past.

Clicking on Window Transparent will make the current background color transparent. This works well to blend the text into either the Title bar, the status bar or the windows desktop. You will have to experiment with this feature. If the text becomes hard to read then click on Transparent again to turn it off. Below are two windows showing regular gray background and transparent background.

The two newest items are set and show Favorite Verses

Selecting Set Favorite Verses will show the verse chooser.

Select one or more verses with your mouse then click Add Verses to Memorize List button. Continue to do this until you are done. You can click Display Verses to see the result.

Click Set Times to enter a list of times you wish to see your chosen verses. Just use 24 hour time and leading zeros from midnight to 10am.

I will also look at add other resources in the future. This release contains close to 2,500 items between the three source files.

Automating Windows

[Release 1.18 is here, Shortcuts Creator. Users can now drag and drop multiple files onto the main window and it will process each one appropriately. It supports: 1) Program EXEs, 2) Windows Shortcuts, 3) URL files saved from browsers, 4) Folders and 5) other Documents. I still need to add editing of single shortcuts instead of opening the entire My Shortcuts file. That will be coming soon.] You will need to install the small AutoHotkey interpreter for this program to work. It is here, AutoHotkey Download. Just click on download and use the installer. The program doesn’t do anything until an AutoHotkey script is run.

For quite some time I have been interesting in speeding up my interaction with both Windows programs and the operating system itself.

The common repetitive actions to be automated are:

  • Launching or switching to an application
  • Entering repetitive single and multi line text
  • Opening files and/or folders
  • Displaying regularly visited Web pages
  • Searching through recent files/folders/programs and web urls

In order to do this, the following scripts have been written:

  1. Shortcuts Creator – creates the types of shortcuts above without programming knowledge and adds them to
  2. MyShortcuts – a text script file that contains all of your shortcuts as well as some required functions to display and launch them.
  3. Multi-Launcher – a program that runs in the background gathering your recently launched programs, recently opened folders and documents, and keeps a history of recent web pages. You can quickly search through these lists and switch to or relaunch any item.

After you have created your main shortcuts, you will only run Shortcuts Creator when necessary. MyShortcuts will be running and contains quick access help and your shortcuts. Multi-Launcher is optional but I feel quite valuable since many of us do not bookmark a lot of web pages we may need later on.

For example, to create a shortcut called ffox to launch the Firefox browser, simply enter ffox in item 1, enter a description in item 2 then click on Launch-File. Browse to either an existing shortcut or the Firefox program file. This will create a keyboard shortcut called rffox. File and Program shortcuts start with the letter r since you are running them.

This adds the shortcut to your myshortcuts file. You can click Display Current Shortcuts and see it listed.

You can use it in three ways: 1) type ffox inside any edit window or box, 2) click the My Shortcuts icon then double-click on rffox or 3) press both Shift keys to display the Launcher. From the Launcher enter rffox. The Launcher will close the Firefox will run.

For now, if you need to change a shortcut, you can use Edit Shortcuts. This does expose the underlying script language. I plan to add Edit and Delete shortcut options soon.

You can also make shortcuts to Open Folders (they start with the letter f), shortcuts that launch web pages (they start with the letter w) and shortcuts that are replaced by either single or multi line text (they start with the letter t).

For example, typing taddr could enter:

John Doe
100 Main St.
Anywhere, USA

There are tons of uses for shortcuts and used properly they will save you a lot of time. For files, folders and programs, shortcuts will only launch the item the first time; afterwards, typing those shortcuts will make those windows instantly active.

A secondary application called Multi-Launcher can also be access from Shortcuts Creator. Between the two programs you can effectively launch all of your standard programs and documents AND search a history of recent files, folders, programs and web pages.

I will post up the actual applications in a few days.


Bible Promises software

[Bible Promises v1.11 uploaded on Sept 2nd]

Bible Promises can be downloaded here, Bible Promises. It is less than 1 megabyte. Just open the zip file, place the Bible Promises executable anywhere and run it.

I was thinking lately how slack I’ve been at updating my Bible Study application. I just had no new ideas until recently. While browsing the web for lists of promises that God makes to His children in the Holy Bible, I ran across some PDF formatted booklets. One of them on this page http://www.pathlights.com/Bible%20Promises/Bible-Promises.pdf was in a format I could quickly adapt to an application. This would be a “quickie” application for those who desire a very light Bible program.

By creating a popup menu in the place of a Table of Contents, the program is very easy to navigate. The popup menu also is shown when you click the program’s icon in the task bar. You can click anywhere else to close it.

Simply select a desired group of promises from the menu.
And, viola!
You may now read through the promises or press F6 to listen to Audio. F7 will Pause/Resume Audio and F8 will Stop the Audio. [Important – whenever you close a reading window, the program menu will appear again. If you are done reading you may exit the program or just click outside the menu to close it. I have it reappearing in case you aren’t done reading.]

For convenience for readers, you may change the font size from 8 to 24 point and change the font from Times to Arial. The background color is also changeable via Shift F1 to F8. Click About Bible Promises for information.


I wanted to include a little more in the program. So I borrowed one Daily Devotional and one Reading Plan from my Ready Bible Study application. In this way, users desiring a quick read each day, can simply use this one program. The devotional is “One Day at a Time” and the reading plan is “New Testament in 90 days plus Psalms & Proverbs in 31 days.” For a regular Bible study program with multiple Bibles, Commentaries, Devotionals, Reading Plans, Outlines, Dictionaries, Topics, click here for more information. Yeah, I know, that was a cheesy advertisement. 🙂

This program starts with a centered popup menu which disappears when you select an item. When you close the item’s window, the menu is re-displayed. If you click away from the menu, it will disappear. In order to show it again, click on the program’s icon in the Task Bar at the right side.

Right-clicking on the program’s icon will display a secondary menu. All of the options are self explanatory except Sleep After Audio. Since you may press F6 from any number of windows, let’s say a devotional, a daily reading and a set of promises, it can take several minutes for Audio to finish. If you are playing several items before bedtime, you can have the program put your computer to Sleep when the Audio is finished. It will give you a 10 second option to cancel; otherwise, the computer will then sleep. [Note: If any Windows 10 users find the audio stops prematurely, let me know and I will fix it. I have no issues on Windows 7 and 8.1 but have one PC with Windows 10 that sometimes cuts audio short if several items are queued up.]

You can select Auto Start and the program will add a shortcut to your startup folder.

The program also has a Bible Browser option that is found in the tray menu and by clicking Today’s New Testament / Psalms readings.

Choosing the browser displays this window. The text size and background color will match the other windows and the window is resizable.

You may easily navigate the New Testament and Psalms/Proverbs and also do text searches. For example, searching on Jesus Christ displays the following. You may press F6 to have the program play Audio for you. I hope this is a worthy addition to the program.Version 1.11 – Bible Browser window can be resized now.
Version 1.10 – Added keys to change Font Size and Type (<, >, [ and ]) for laptops without a Mouse.
Version
1.09 – Bug fix, Bible Browser size settings now restored properly.
Version 1.08
– Added Audio Pause option to the tray menu.
Version 1.07
– Bible Browser window is separately sizeable now.
Version 1.06 – Tweaked status bar, added Auto Start to the tray menu
Version 1.05
– Added Bible Browser window to the program
Version 1.04 – Added Promises sub menus to the program’s tray menu
Version 1.03 – Split daily Bible reading into two parts: New Testament and Psalms/Proverbs as it could be quite a bit of reading.
Version 1.02 – Minor tweaks to status bar.
Version 1.01. When the reading window is resized, it will keep that size the next time you start the program. The minimum size is 570 x 300 so that the status bar is fully visible.